Selling Workshops & Classes on Squarespace (4 Ways)
I design Squarespace templates for therapists and coaches, and many of the helping professionals I’ve worked with offer live workshops and classes in addition to their one-on-one therapy and coaching services.
Using Squarespace for your therapy or coaching website means that you can schedule live events and collect registration or ticket fees right from your own website. You can even sell recordings of your past workshops or classes for some passive income!
So let’s talk about four ways to sell workshops and classes on Squarespace:

1: Sell tickets to a future event using Squarespace Scheduling
Perhaps the most intuitive way to sell tickets to a future event on Squarespace is to use an online scheduler, like Squarespace Scheduling (formerly Acuity Scheduling).
Similar to booking one-on-one appointments, you can schedule a group event and have folks sign up straight from your website.
I like this option the most because it gives you all the benefits of regular appointment scheduling, like reminder emails, calendar integrations, and scheduling limits, while also giving you the option to charge a ticket price and process payments.
For this method, you’ll create a “Group Class” in Squarespace Scheduling, set the event details and price, then embed the sign-up form anywhere on your website so that your visitors can easily sign-up.
Here’s what a group class sign-up looks like from a website visitor’s perspective:

Step One: Create a Group Class in Squarespace Scheduling
First, you’ll need to create a new Group Class. Keep in mind that using Squarespace Scheduling (or Acuity Scheduling) requires an additional subscription. If you already have a scheduling platform that allows for group events and payment processing, feel free to skip to step two.
In your Scheduling panel or Acuity account, navigate to “Appointment Types.”
Click “New Type of Group Class.”
Enter your event details: name, description, event duration, price, etc. You can also set the maximum number of people allowed to register for the event.
Click “Create Appointment Type” to proceed.
Next, open the group class you just created, and click “Offer Class.”
Enter the date and time of your event.
Click “Save Class.”
Step Two: Embed your online scheduler in Squarespace
Once your event is created in Squarespace Scheduling, Acuity, or another scheduler platform, it’s time to add the sign-up form to your website.
First, decide where you’d like to place your event sign-up. Some options include:
An Events Page

If you plan to host regular events, it might be worth adding an Events Page to your website. Similar to a Blog page or a Store page, Events pages hold a catalog of events, keeping your happenings chronologically organized.
Similar to Blog posts, any type of content block can be added to Event posts, so you can add even more event details and customize the look of the page to encourage folks to sign up.
Navigate to your Pages panel.
Click the “+” icon next to Not Linked.
Select “Events” from the list of page types.
Add a new event and enter your event details.
Click “Save.”
A Landing Page
Planning to host a single event? A landing page might do the trick.
Create a new page under your Not Linked section. This can be a normal, blank page.
Name the page something short and descriptive of your event title.
Add Content Blocks to the page to design your landing page. Include event details and treat it like a sales page.
Click “Save.”
Then, add your sign-up form (created in Step One) to your chosen sign-up page:
if you’re using Squarespace scheduling / acuity:
Click “Edit” on the page.
Click “Add Block”
Click “Scheduling”
Follow the steps to connect your group class OR paste your Direct Scheduling Link.
Click “Save.”
if you’re using a third party scheduling platform:
Click “Edit” on the page.
Click “Add Block”
Click “Code”
Replace the placeholder code with the Embed Code provided by your scheduling platform.
Click “Save.”
Step Three: Link to the event
Once the event page is set up, it’s your job to make sure people who visit your website can find it! Here are a few options:
Option One: Add the page to your header navigation

I only recommend adding pages to your header navigation when they’re permanent. In other words, if you plan to take the page down after the event, consider the other options described below.
If you plan to host regular events, and you chose to use an Events Page, this would be a great addition to your header navigation.
Simply drag your Events Page from your Not Linked section to your Main Navigation section. From here, visitors will be able to see all of your published upcoming events.
Option Two: Create a pop-up or announcement bar

If you’re hosting a single event and you’d rather not add a landing page to your header navigation, consider enabling a pop-up or announcement bar to let visitors know about the event.
In Squarespace, navigate to Marketing > Promotional Pop-Up or Announcement Bar.
In these panels, you can customize the wording, styling, and timing of your announcement and most importantly: link to the event sign-up page.
2: Selling tickets to a future event using a Store Page
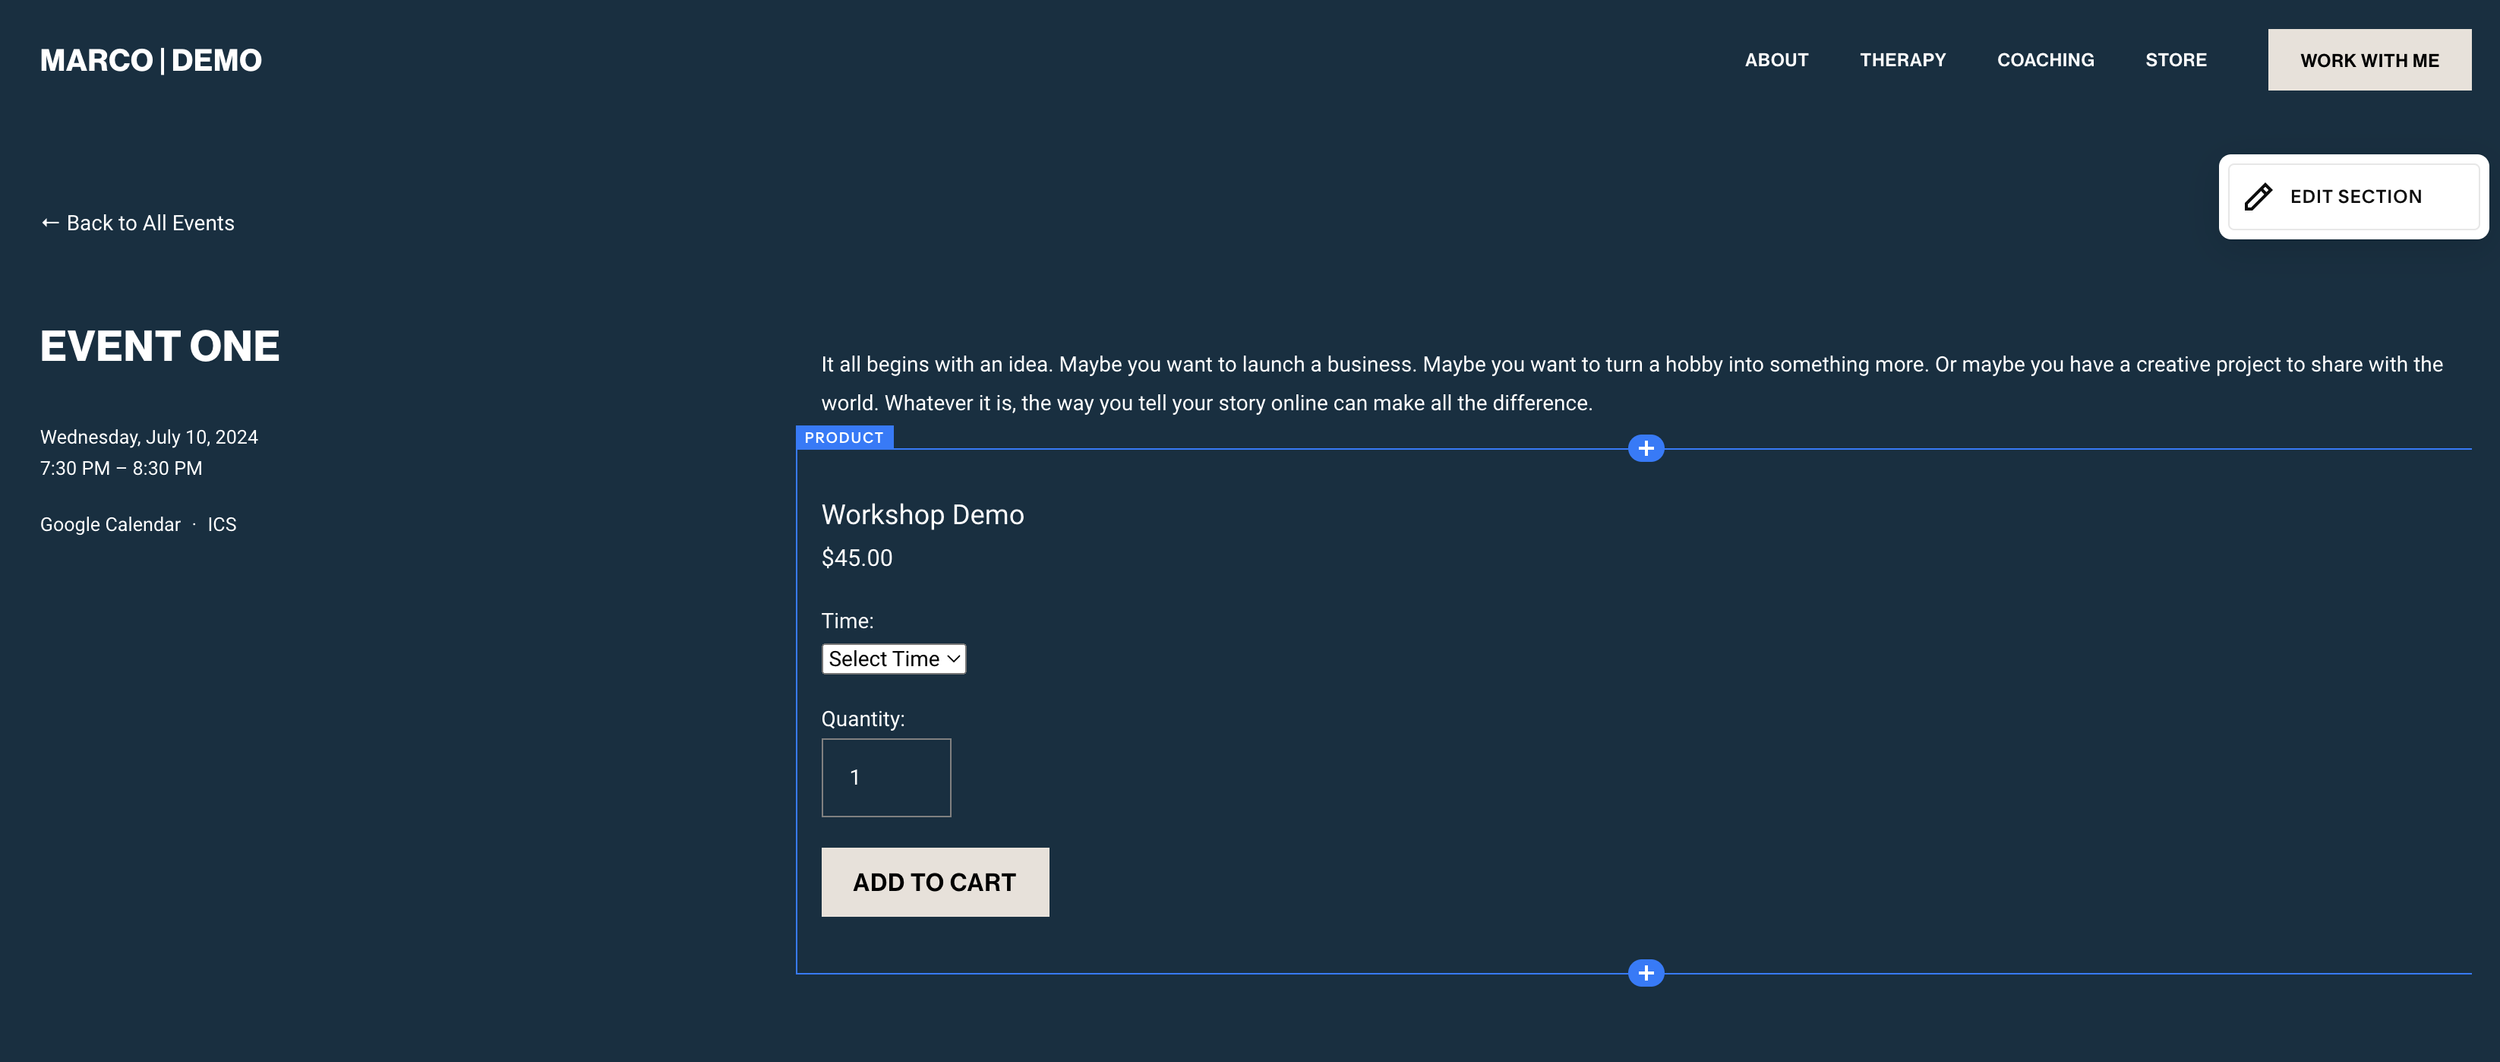
If you’d rather not use scheduling software to host groups, workshops, or classes, you can use Squarespace’s Commerce feature to sell tickets and process payments as well.
For this method, you’ll create a “product” in Squarespace, set the event details and price, then list the product on an Events Page so that your visitors can easily sign-up.
Step One: Create a Store Page
First, you’ll need to add a Store page to your Squarespace website. Keep in mind that your website will need to be on a Squarespace Business or Commerce plan to accept payment and process transactions.
In your Pages panel, click the “+” icon next to “Not Linked”. Then, select “Store” from the list of page types.

Adding your new Store page to your Not Linked section will ensure that your current website visitors won’t navigate to the page while it’s being worked on.
Step Two: Create a Service Product
Once you have a Store Page, click the “+” icon to create a new product.

Select “Service” from the list of product types.
Use the Name, Image, and Description fields to add information about the workshop.
To add images, click the Upload Images arrow.
Next, you’ll want to set a price and class size. Click the Pricing & Variants tab to customize this.
Set the price per ticket under the Pricing column.
Set the class size or maximum tickets available in the Stock column.
If you’re offering your class or workshop at different times on the same day, or other options you’d like to make available, you can add more variants by clicking the “+” icon.
Enter the Variant name, such as “Time” and click save.
Then, click the “+” below the SKU to add new variants.
From here, you can edit the pricing and capacity options for each variant.
If you’d like to provide additional info, such as client testimonials or FAQs, the “Additional Info” tab is where you’d put that. Anything added to the Additional Info tab will display below the product description and purchase button.
If you’d like to collect additional info upon registration, you can choose to enable a Form using the “Form” tab.
Click “Save.”
Step Three: Publish the Service Product
Click Save & Publish to publish the product. This makes the product immediately available for purchase. If you’re not ready to publish yet, you can schedule it to publish at a later date or save it as a Draft.
Step Four: Choose where to display your product
From here, you can choose how you’d like people to interact with your website in order to find and purchase a ticket to your event. Here are some options:
Option One: Add your Store to main navigation

The first option is to add your Store page to your main navigation by dragging the page into place in your Pages panel. Keep in mind that every product listed on this Store page will display when the page is clicked.
If you plan to only list events in this particular Store page, you might consider naming the page “Workshops” or “Events” so that folks know what they’re looking at when they click the page from your main navigation.
Option Two: Add the product to an event
As I described earlier in this article, an Events page is a great way to display upcoming events in chronological order. If you choose this option, create an event, then insert your product into the Event Description using the Product Block.
This way, visitors can reserve a spot and pay for their ticket directly from the event page.
Option Three: Add the product to a landing page

Again, if you plan to only offer one event, a single page dedicated to the event might make the most sense for you. In this case, use the Product Block to display the product’s purchasing options directly on the page.
3: Host members-only events using Member Areas
As a more niche example, let’s say you plan to host events that are only available to members of a community that you’ve created. This would be a great time to use Squarespace’s Member Areas.
At an additional monthly or annual fee (pricing info here), you can create protected content that only members can see.
Rather than charging for the event itself, some of my past clients have set up paid memberships through Member Areas, then offered free members-only events.
If you’re considering this option for hosting events, I recommend learning more about Member Areas here.
Member Areas can be added to any Squarespace 7.1 site, but if you’re looking for a plug-and-play option, my Sage template comes with a built-in Member Area!
Once your Member Area is set up, you can add an Event page or a Scheduling Block anywhere within the Member Area so that your members can register but regular website visitors cannot.
add an events page
Under your Member Area, click “Add Page.”
Select “Events” from the list of page types.
Create a new event.
Add the event details, including sign-up instructions or joining instructions.
add a scheduling block
Under your Member Area, click the page where you’d like to insert your scheduling form.
Click “Edit” on the page.
Add a Scheduling Block.
Paste your event’s scheduling link.
Click “Save.”
4: Sell past workshops, classes, and events using a Store Page
Let’s say you host a live workshop, and you want to sell the recording of that workshop on your website after the fact. This is a great idea, in my opinion!
I’ve done this here at Hold Space Creative, with my SEO workshops and Pinterest workshop, and I love it because I can help more people without always hosting live workshops (which can be draining for this introvert).
Here’s what I do to sell event recordings on my Squarespace website using a Store page:
Step One: Schedule the event & sell tickets
Before you can sell an event recording, you have to host an event! Choose from any of the methods I described above to sell tickets from your own Squarespace website and gather registrations.
Step Two: Record the event
When the event begins, record it! Obviously, this is easiest for virtual events since most video-conferencing allows for recording.
A word of caution: Try not to mention any dates or details that may change (like current prices/rates, upcoming holidays, deadlines, etc.) during your recording because as time passes, these details may confuse folks who purchase the replay. If you have to mention these types of things, wait until the recording stops.
Step Three: Upload the recording to a video hosting platform
After the event, save the recording to your computer. Then, upload the file to your video hosting platform of choice. You’ll need a URL to your video, so YouTube, Vimeo, or Loom are your best options.
Step Four: Create a password-protected page on your website
This is where your customers will go to watch the event recording.
Navigate to your Pages panel, and insert a new page under your “Not Linked” section.
Title the page according to your event title.
Open the page’s settings and enter a password in the “password” field (take note of this password).
Click “Save.”
Next, insert your video.
Click “Edit” on the page.
Click “Add Block”
Select “Video"
Edit the Video Block and click “Add Video”
Select “Add From Link”
Paste your YouTube, Vimeo, or Loom URL
Click “Save”
Add any other content to the page that you see fit, keeping in mind that this is where your customers will go after they purchase your event recording.
Step Five: Create a digital download PDF
When you create a product in Squarespace for your event recording, you’ll need a digital download that customers will get as soon as they purchase. I recommend creating a simple PDF that includes the link to your video page and the page’s password.
Open Google Docs.
Create a new document.
Paste the public URL to your password-protected page.
Type the page’s password.
Include simple instructions for your customer (ie. “Click this link to watch the class and enter this password when you get there”).
Include your contact info in case customers need help.
Feel free to include other content, such as branding, a thank-you message, or a picture of you (a little personalization goes a long way).
When you’re done, click File > Print.
Save as a PDF.
Step Six: Create a Digital Product in Squarespace
Add a Store page to your website if you haven’t already. Once you have a Store Page, click the “+” icon to create a new product.
Select “Digital Download” from the list of product types.
Use the Name, Image, and Description fields to add information about the product.
Upload the PDF you just created to the “Inventory” file upload section.
To add images, click the Upload Images arrow.
Next, set a price.
If you’d like to provide additional info, such as testimonials or FAQs, the “Additional Info” tab is where you’d put that. Anything added to the Additional Info tab will display below the product description and purchase button.
If you’d like to collect additional info upon purchase, you can choose to enable a Form using the “Form” tab.
Click “Save.”
Step Seven: Publish your product
Once your product is formatted in Squarespace, make sure your Store page is visible from your main navigation. Then, publish your product!
If this is your website’s first product, I recommend testing out the purchase process before making your store public. You can learn more about Squarespace Commerce here.
Don’t forget to promote your workshops & classes!
Adding your events to your website is only the first step. To sell tickets, you’ll need to tell people about it (more than once), provide sign-up instructions, and answer any questions folks might have.
Make sure you know your niche, write marketing copy that connects, and be yourself! Venturing into live events may be new territory for you, but this is a great way to share your expertise outside of the therapy room (or coaching calls)!