Adding Downloadable Client Forms to Your Squarespace Website in 2 Easy Steps
As a web designer for therapists and coaches, I’m often asked how to add downloadable client forms to a Squarespace website.
Whether you need new clients to download your practice policies before attending their intake session, or you have worksheets and resources you’d like to have readily available, this guide will show you how to add file downloads to your Squarespace website quickly and easily!
How to add downloadable forms in Squarespace:
Step One: Prepare your client forms for upload
Before you get started, you’ll want to gather all the documents you plan to upload to your Squarespace website and make sure they’re formatted according to the following guidelines:
File size: 20MB or smaller.
File type: most file types are accepted, but PDF, JPG, or ZIP are the most common.
If you want clients or site visitors to download a bundle of files at once, compile them into a single folder on your computer and compress the folder into a .zip file.
Save them somewhere on your computer that’s easy to find; you’ll need to locate them in step two.
Step Two: Create a link in Squarespace
Now that you have your documents ready for upload, it’s time to add them to your Squarespace site! Log into your Squarespace account and click on your website to get started.
Decide where you’d like to add the link that folks will click to initiate their form download.
This could be a text hyperlink, or a button, or link in your header navigation. I’ll go through each of these options below:
Adding a document to a text hyperlink
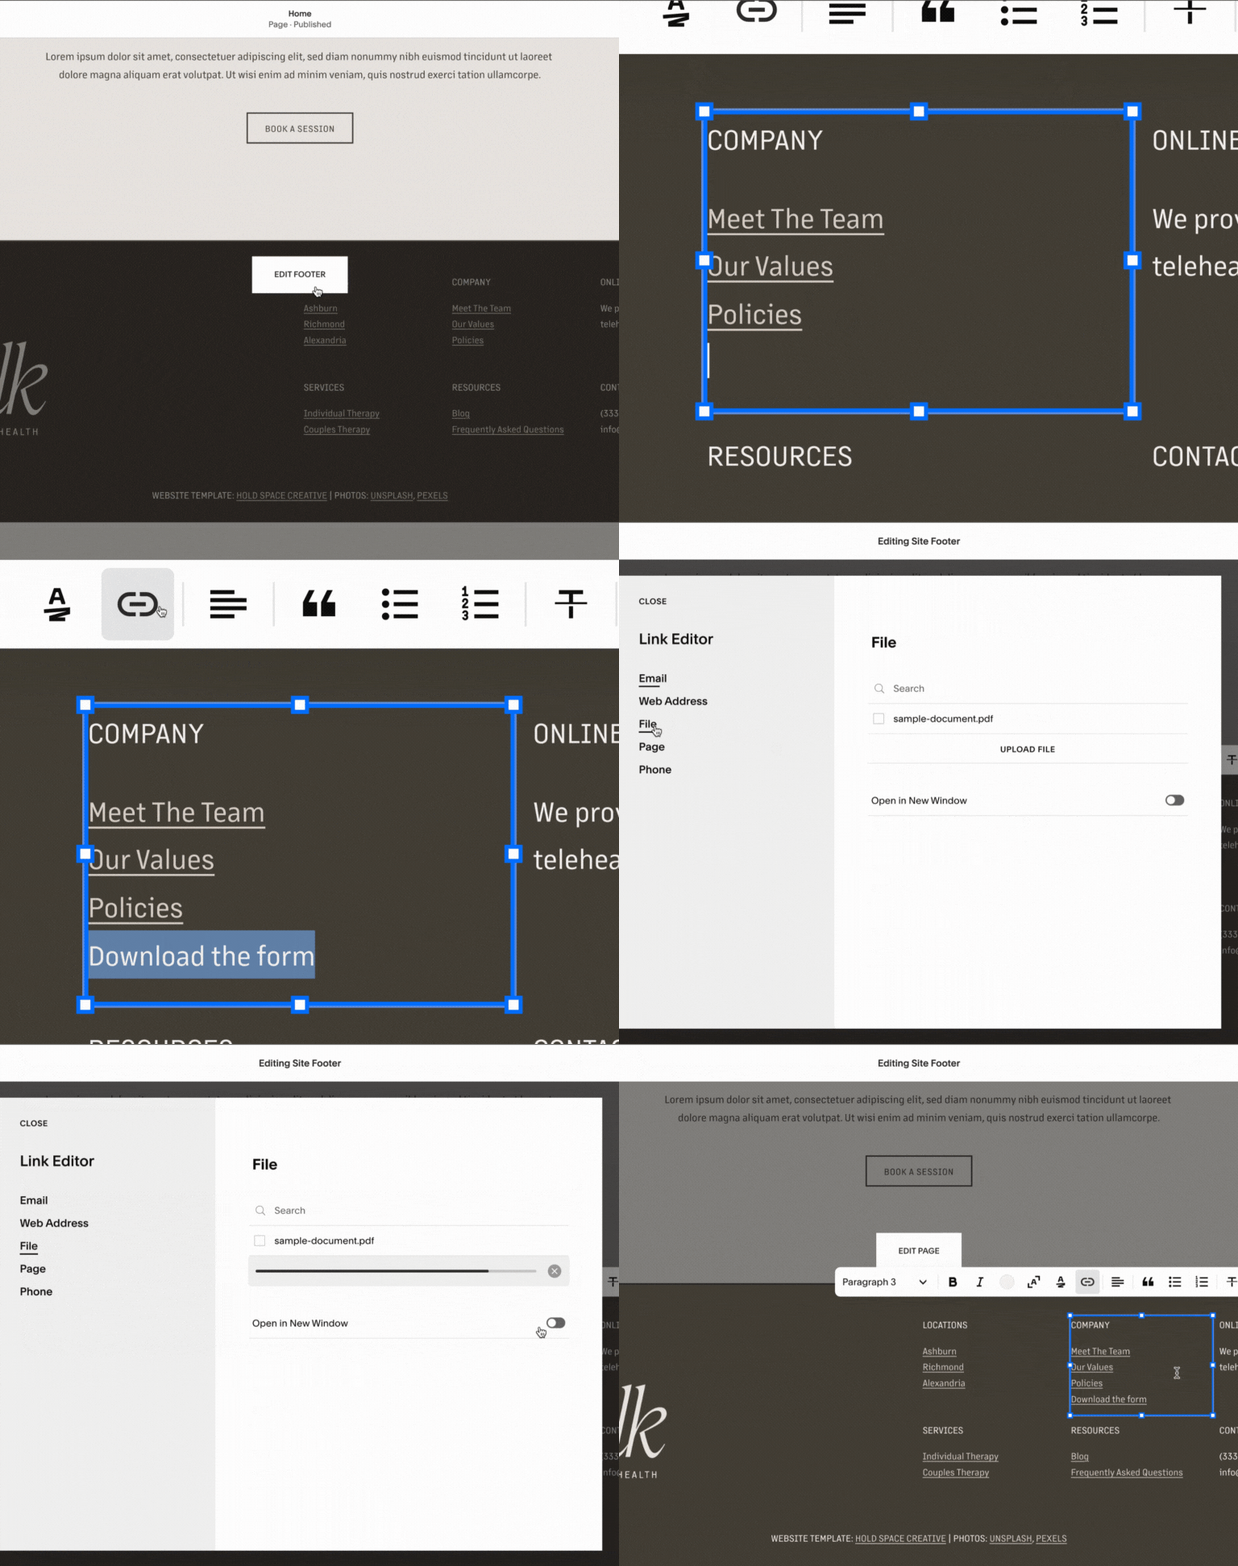
If you want to add your downloadable forms to your website footer, or within a paragraph of text, adding your client forms to a text hyperlink is the way to go.
Here’s how to do it:
Type some text wherever you’d like the hyperlink to appear.
In the Text Block toolbar, click the Hyperlink icon
Click the Gear icon
Click the “File” tab
Click “Upload File” to choose the file(s) you prepared in Step One
After your file is uploaded, you’ll see a list of files. Click the file you want to link in the current hyperlink. A checkmark will appear next to the file that will be linked.
After choosing a file, switch the Open in New Window toggle on to make the file open in a new tab.
Click “Save,” then “Apply”
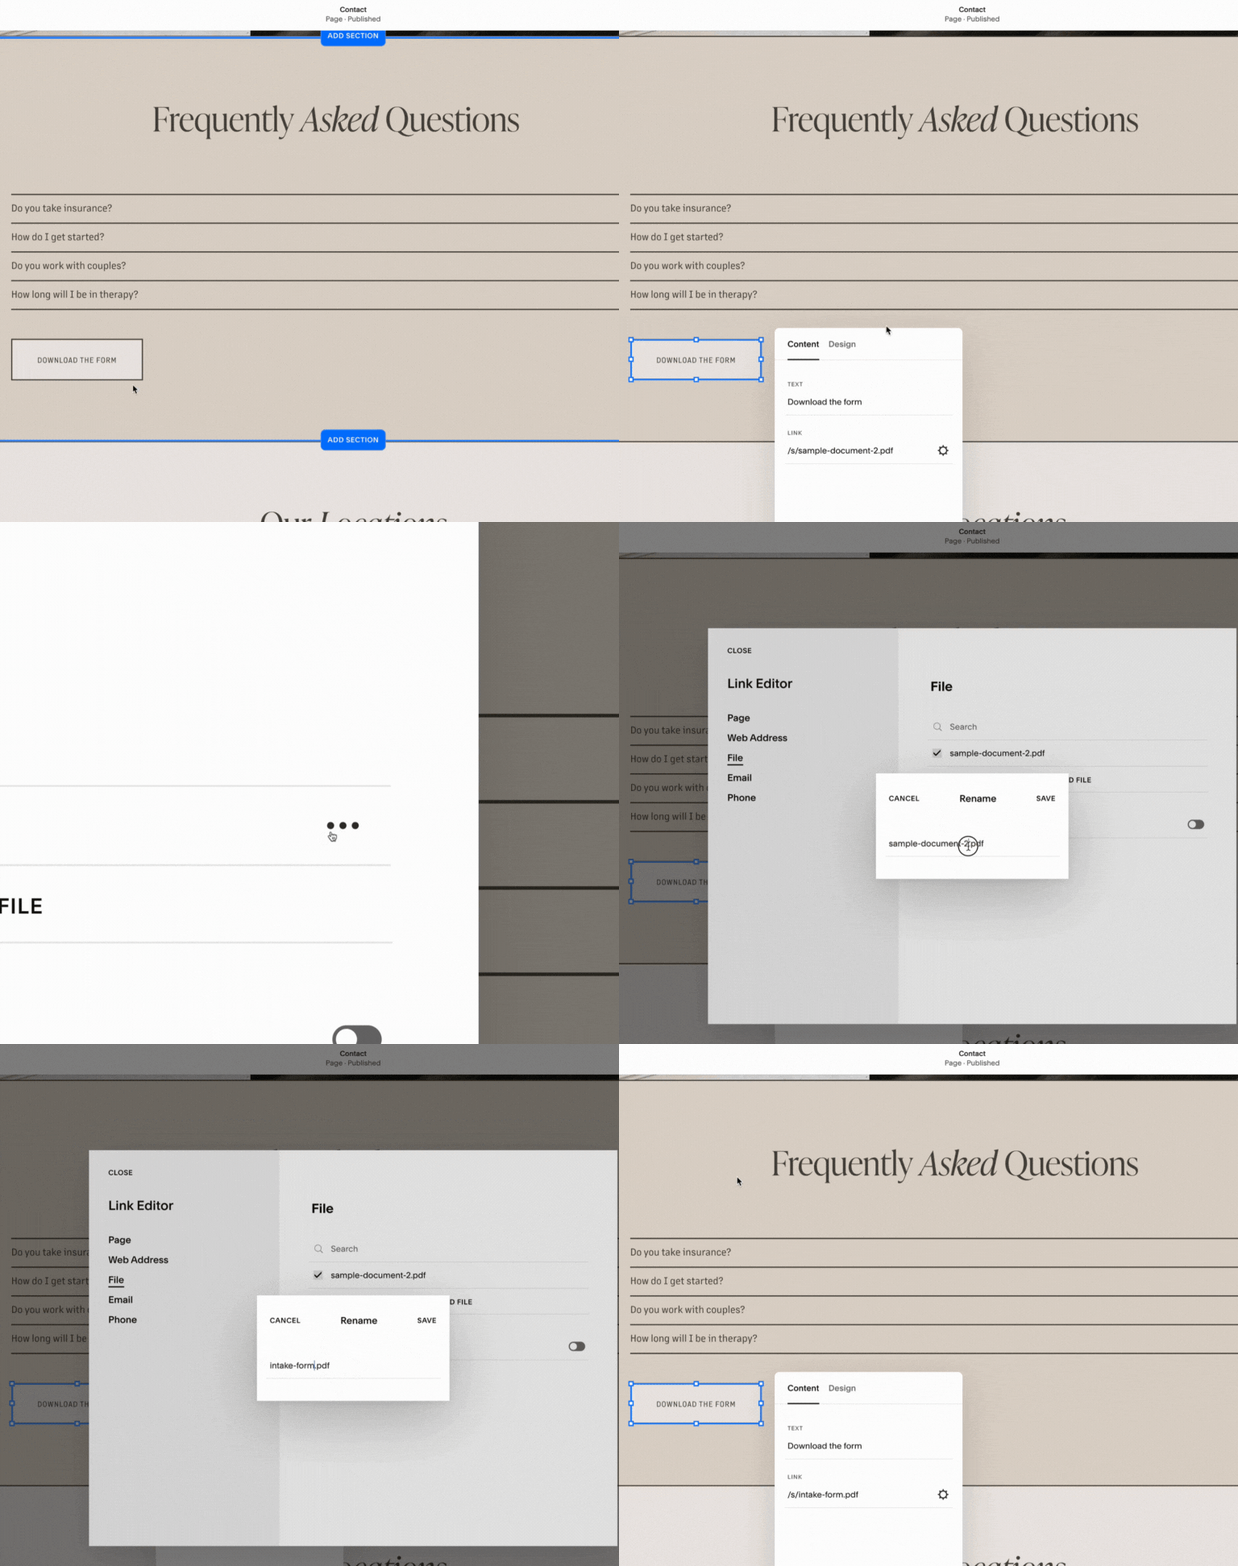
Add a document to a button
If you want to add your downloadable client forms to a button (or series of buttons), here’s how:
Insert a Button Block
Click the Pencil icon to edit the Button Block’s settings
Under Content, replace the default button text to your own call-to-action.
Click the Gear icon
Click the “File” tab
Click “Upload File” to choose the file(s) you prepared in Step One
After your file is uploaded, you’ll see a list of files. Click the file you want to link in the current button. A checkmark will appear next to the file that will be linked.
After choosing a file, switch the Open in New Window toggle on to make the file open in a new tab.
Click “Save,” then “Apply”
Add a document to a header navigation link
Lastly, if you want to add a client form to a link in your header navigation, follow these steps:
Navigate to the Pages panel
Next to Main Navigation, click the plus (+) icon to add a new page
Select Link from the list of page types
Click the Gear icon
Click the “File” tab
Click “Upload File” to choose the file(s) you prepared in Step One
After your file is uploaded, you’ll see a list of files. Click the file you want to link. A checkmark will appear next to the file that will be linked.
After choosing a file, switch the Open in New Window toggle on to make the file open in a new tab.
Click “Save,” then “Apply”
Managing your files in Squarespace:
The steps above cover exactly how to add downloadable forms to your website, but if you’re interested in learning more about managing your files within Squarespace, keep reading!
Edit a file name
I suggest naming your files according to the title of the document, and including your business name so that clients can easily find the document on their computer later, if needed.
For example: intake-form_hold-space-creative.pdf
However, if you’d like to edit a file name after you’ve uploaded it to your Squarespace website, here’s how you can do that:
In your page editor, find your hyperlink or button and open the link settings
Click the Gear icon
Click the File tab
Locate the file in question and click the ellipses (...) next to the file name.
Click Rename
Enter a new name, then click Save.
Click Apply
Delete a file from Squarespace
Removing a downloadable file link is as simple as deleting the hyperlink or button, but folks who have the direct link will still be able to open the file.
If you want to delete a file from your website, repeat the steps from above, but rather than “Rename”, choose “Delete” from the dropdown next to the file (screenshot below).
Or follow these steps:
In your page editor, find your hyperlink or button and open the link settings
Click the Gear icon
Click the File tab
Locate the file in question and click the ellipses (...) next to the file name.
Click Delete
Click Apply
After you delete a file from your site, Squarespace keeps a copy of the file. Learn more about permanently deleting files here.
Keeping forms private
If you’d like to keep your forms private, I suggest creating a password-protected page, adding file download links to the page using Step Two (above), and sharing the page password with your clients.
Here’s how to accomplish this:
In your Pages panel, scroll down to Not Linked and click the plus (+) icon to add a new blank page.
Title your page
Click the Gear icon on the page to access the page settings
Under General, locate the Password field and type a password.
Click Save
Then, add blank sections to the page to insert your files. Use hyperlinks or buttons, as outlined in Step Two (above), and be sure to click “Save” on the page when you’re done.
From here, you can choose how you want to share the page URL and password with clients. Only visitors with the password will be able to access the file links and download your forms, so this is the best way to keep your forms private on Squarespace.
Note: If you need to collect any client information with your forms, I suggest using a HIPAA-compliant EHR for client forms like Simple Practice.


